Functionalities
Create a subnet
Click on Ipam icon in FusionDirectory
On Ipam main page, click on Actions –> Create –> Subnet

This will bring you to subnet configuration page
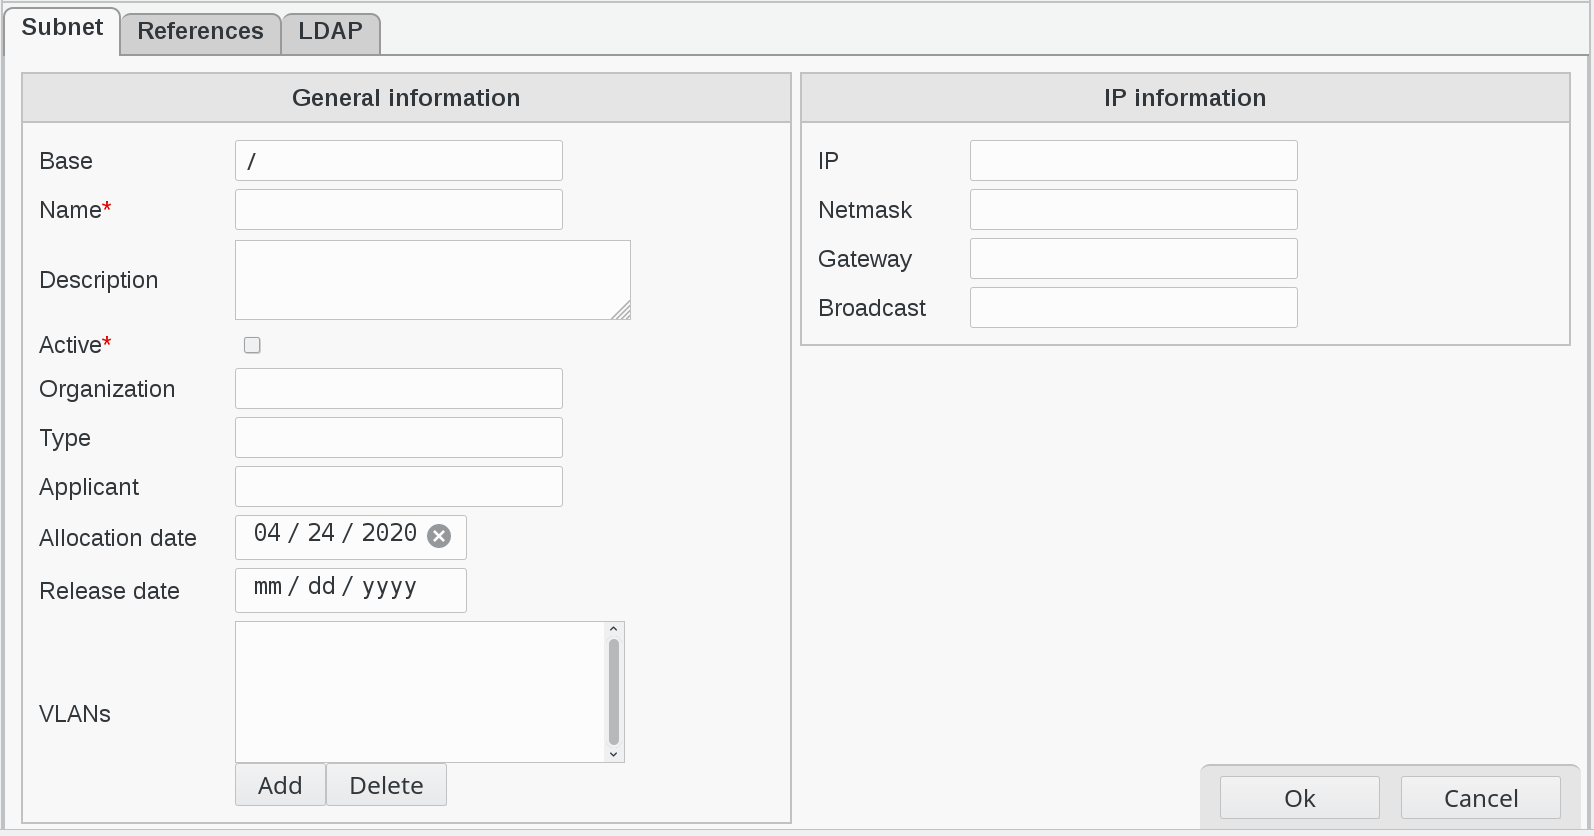
Fill-in the following fields :
Base : object base
Name : subnet name (required)
Description : description of this subnet
Active : is the subnet active (required)
Organization : organization who asked for the subnet
Type : subnet type (lan, wan, wifi)
Applicant : name of the person who asked for the subnet
Allocation date : start allocation
Release date : end allocation date
VLANs : VLANs linked to this subnet
IP : subnet IP
Netmask : subnet netmask
Gateway : gateway IP
Broadcast : Broadcast IP
Note
You can attach multiple VLANs to a subnet.
Example of Subnet
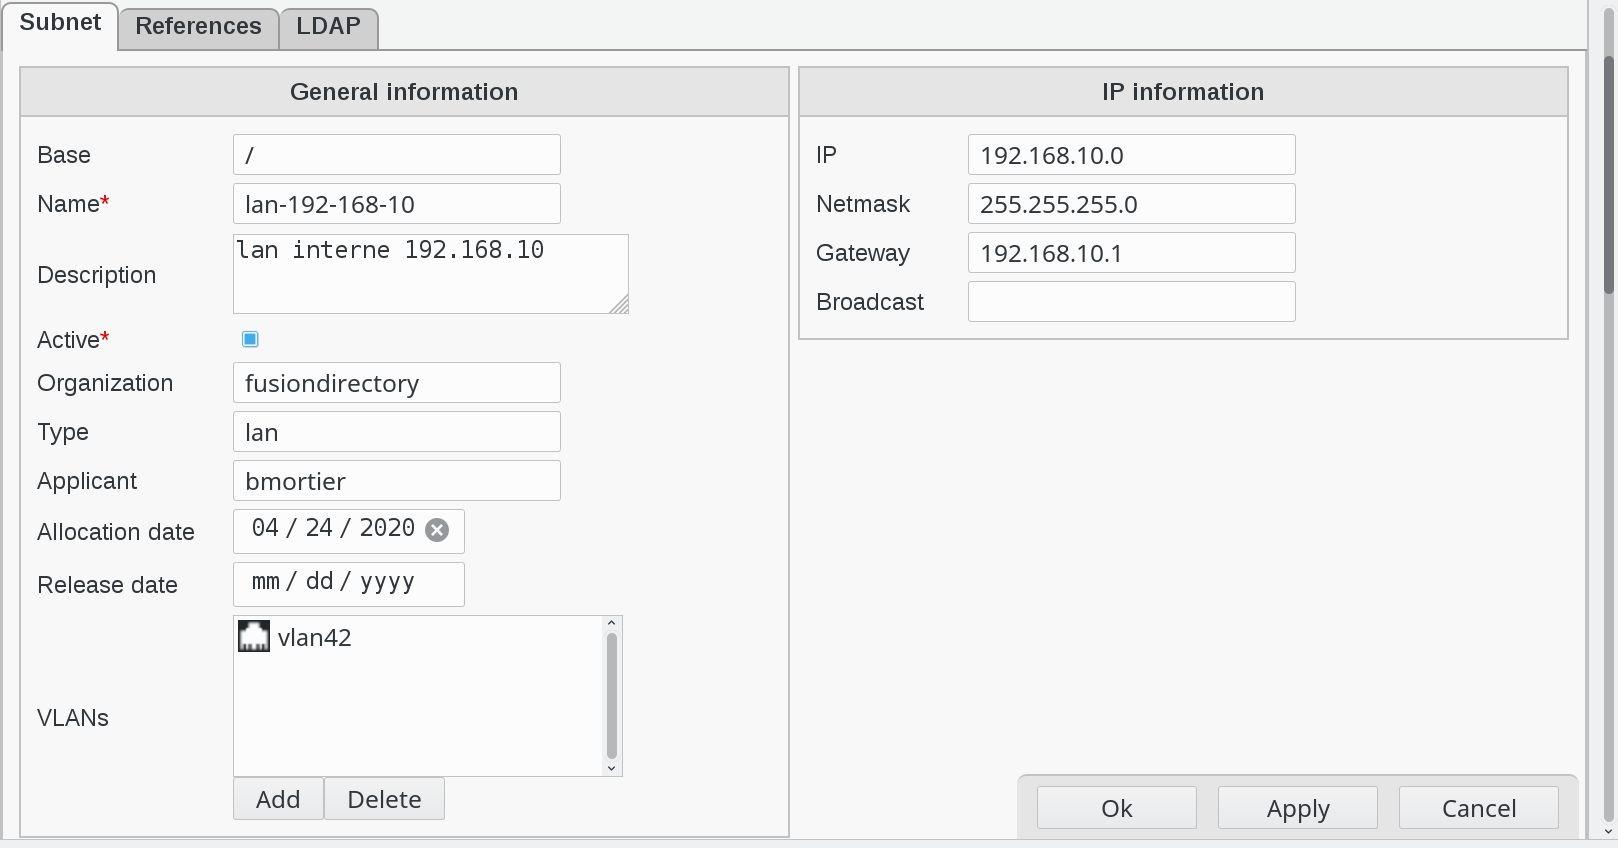
When you are done, click on Apply button bottom right to save your subnet

Then, click on OK button. This will bring you back to Ipam main page

You can now see you just created subnet in the list

Create a VLAN
On Ipam main page, click on Actions –> Create –> VLAN

This will bring you to VLAN configuration page

Fill-in the following fields :
Base : object base
Name : subnet name (required)
Description : description of this vlan
Active : is this subnet active (required)
Organization : organization who asked for the subnet
Inner ID : inner VLAN ID (required)
QinQ ID : QinQ ID VLAN ID
Applicant : name of the person who asked for the subnet
Example of VLAN
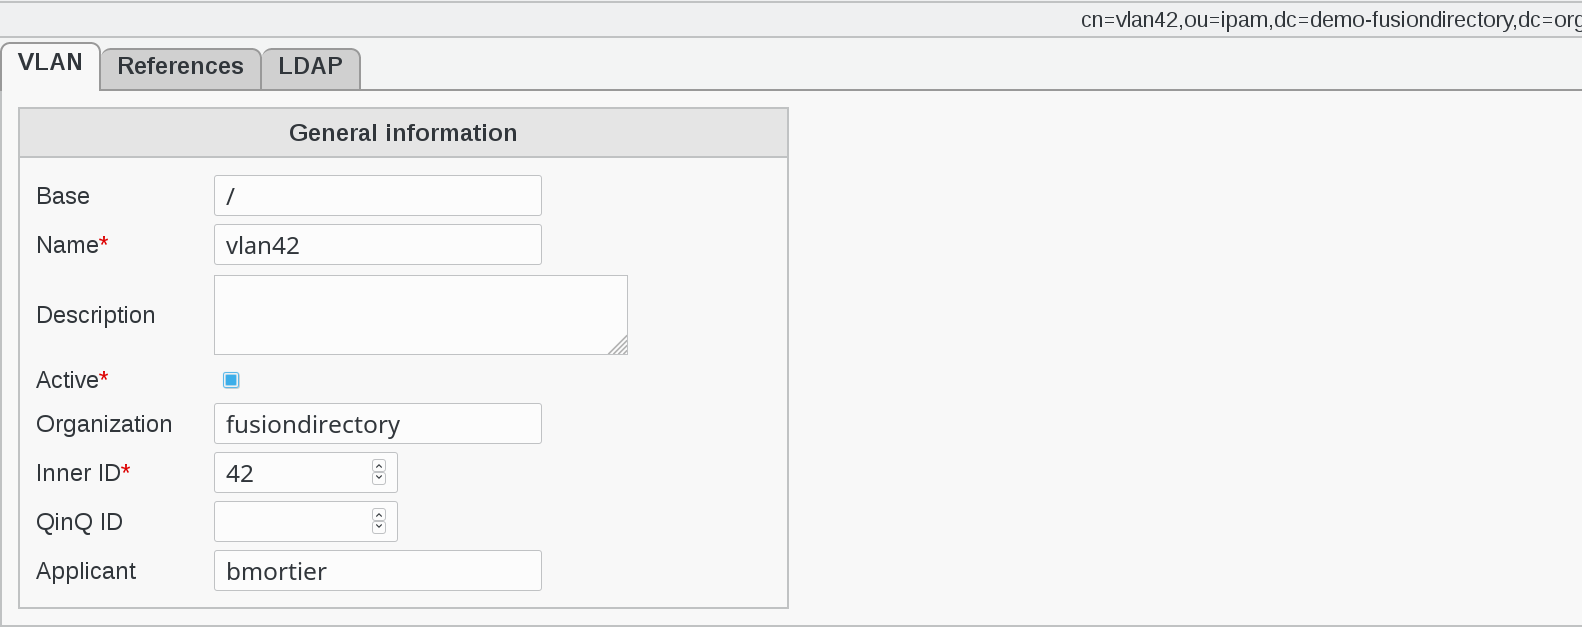
When you are done, click on Apply button bottom right to save your vlan
Then, click on OK button. This will bring you back to Ipam main page
You can now see you just created vlan in the list
VLAN section when creating Systems
Note that when you create a system in Systems section, additional IPAM fiends will appear and need to be filled :
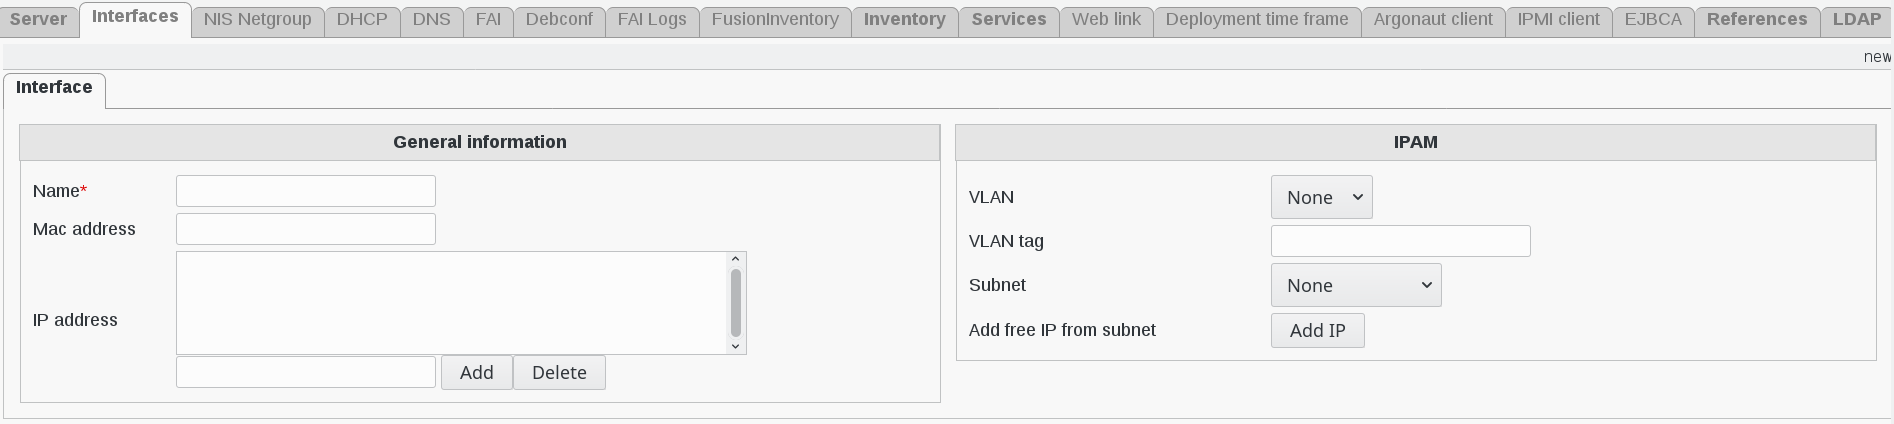
VLAN : if you select a vlan, the network subnet will be restricted to the vlan contained in this subnet
VLAN tag : VLAN tag
Subnet : choose a subnet from the drop-down menu
Add free IP from subnet : the ADD IP button allows you to automatically add a free ip in the subnet selected